Tuesday, December 23, 2014

Christmas wreaths

 How to make Christmas wreaths
Step 1: Cut out a ring. I traced 2 circles (using a plate and a bowl) so they were perfect circles.
Step 2: Cut out many leaf shapes. (Have more than the picture has)
Step 3: Hot glue the corner of the leaf to give it a rounder shape.
Step 4: hot glue all the leaves around the ring. (Layer by layer). The number of layers depends on the size of the wreath, 
Step 5: hang your beautiful wreath in a nice spot!!! :D


Mini Presents

      How to make cute mini presents     
Materials Needed:
-glue gun
-colored paper
-sissors

First: cut you paper like this (Paper must be square).
Step 2: Fold up each paper flap (half way)
Step 3: fold up the inside of the paper flaps too!
Step 4: Hot glue all the pieces together to form the roof or top to the box. 
Step 5: Now you have your box! You can add decorations like ribbons and bows to it.
  Step 6: cut 2 strips of either ribbon or paper. Then hot glue them to the present (or tie a bow).
Step 7: Make bows! See below for all the different types of bows! They aren't too complicated so pick which one is your favorite! 
Step 8: put these adorable presents under a tree or somewhere to decorate!
Comment how this project went and which now you like best!


Thursday, November 27, 2014

Thanksgiving Placemat

   I made nice placemats for decoration for Thanksgiving. It's takes quite a bit of time. I made one in 45 minutes. 

              MATERIALS
       -2 pieces of brown paper
       -orange paper
       -green paper
       -yellow paper
       -red paper
       -scissors (or cutting board)
       -tape


   Step 1) cut out the brown paper into 11     strips. (Use a cutting board if possible)
   Step 2) do the same to each colored paper but cut them the taller way (only 3 orange, 3 yellow, 3 red, 2 green)
   Step 3) tape brown strips onto brown paper
   Step 4) weave colored strips through brown strips that are taped down.
   Step 5) tape the strips once done
   Step 6) repeat steps 4 and 5 until you have used up all your strips!


Wednesday, November 26, 2014

Turkey Place Cards

     These cute turkey place cards make a great decoration at your Thanksgiving dinner table! 
   You can make these by scratch or buy the kit! I got a kit for these at target. Buying the kit is much easier because you don't have to glue them or cut out the shapes. Also it comes with everything you need! 
  Have a great Thanksgiving and put these cards out on the table before you eat! :)

Sunday, November 16, 2014

Paper Pumkins

I made these beautiful paper pumpkins to decorate our table for fall! 🍂
How to make them: 
1) cut 4" by 3/4" strips of paper (example: orange)
2) cut out a circle for base (same color as strips)
3) cut out a green circle (zig-zag scissors if you have)
4) hot glue the tips of strips to circle base
5) hot glue other tips to the green roof
6) cut out small green strip (very small)
7) roll up green strip (this will be your stem)
8) cut out a small green square
9) put hot glue on top of green stem
10) place square on tip of stem 
11) shape the square to the stem (cut w/ scissors)
12) glue stem to pumpkin roof
13) cut out THIN AND LONG piece of green paper
14) curl the THIN AND LONG piece  or green paper (works best on a pencil)
15) hot glue curly piece on the pumpkin
16) smile because you made a beautiful pumpkin

DIY Leaf Roses

Hi guys! Our troop recently had a progressive dinner, and as a decoration, we all made leaf roses. They were really fun to make! Click here to learn how to make them! They may take a few tries, but you'll get it eventually! The instructions call for florist's tape, but we used masking tape and they turned out fine. This would be a great craft to put out on Thanksgiving! Have fun crafting!


Saturday, November 15, 2014

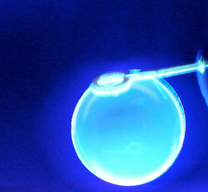
Glow in the Dark Bubbles

Below are the steps to make Glow in the Dark Bubbles!


Materials needed:

  • Glow in the dark sticks
  • Bubbles Bulles 


Step 1: Cut/break open glow sticks
Step 2: Pour glow content into bubbles
Step 3: Shake bubbles well
Step 4: Enjoy your glow in the dark bubbles!

Saturday, May 10, 2014

Perler Beads

These are two Perler Bead creations I made. One is a gift for my mom for Mother's Day and the other one I just thought was cute. I couldn't find the exact pocture that I used to make the owl, but here is another cute one. Or you can just copy mine. I didn't use a pattern for the heart, but you can just copy that one too. Have fun with this craft!

Tuesday, May 6, 2014

Balloon Dart Painting

Below is a way to make a beautiful balloon dart painting in just a few, quick, easy steps.

(1) First, set up a white, canvas board.
(2) Then get a few balloons and fill them up about half way with paint.
(3) Next, tape the balloons up on the canvas (with ducktape or something strong). Or pin them up with darts.
(4) Start throwing your darts at the balloons, and before you know it you'll have a beautiful painting!


Monday, May 5, 2014

Golden Snitch Bracelet Sample

It doesn't look great, but this is a part of a friendship bracelet with the Golden Snitch (from Harry Potter) on it. I only did part of it because the bracelet took real long to make. It was really fun to make and you can kinda tell what it is. Click here for the pattern for this bracelet, click here for how to use a pattern, and click here for how to do the four knots. When you are making the bracelet, remember to pull the strings tight so it isn't too loose. I recommend going to these links in order if you aren't familiar with the "world of friendship bracelets". Leave comments if you get confused. I hope this is a fun project!

Friday, May 2, 2014

Rainbow Loom Girls Scout Cookie Charm

To the left is a picture of a Rainbow Loom Girl Scout Cookie Charm you can make, just by using your rainbow loom hook in under ten minutes!
Here's a video on how:  

https://www.youtube.com/watch?v=c_YRDsVVdJY

Have fun creating your charm!

Monday, April 28, 2014

Home made crayons

Here are some home made crayons
      Step 1: set oven temp to 300
      Step 2: peel crayons
      Step 3: put crayons into cupcake 
                  things (comment if confused)
      Step 4: put in oven and check every                      5-10 mins.
      Step 5: once liquid take out of oven                    and swirl with tooth 
                  pick to make design
      Step 6: let it cool for 20 mins
    

Sunday, April 27, 2014

Pot holder

I bought a loom to make pot holders at Joanns and it's really cool I made it today!  http://www.joann.com
You should check it out!

New blog!!!! :)

We are Girl Scout Cadettes and we have made a blog! We are doing this to explore new types of media. Our blog will posting pictures of crafts we have completed and telling a little bit about them. There may be a little bit about Harry Potter too............  because we are HUGE fans!!!! :) We also might have some posts be about cooking, or dance. We hope you enjoy our blog! :)